
Zendesk integration with Askfield lets you create/update new contacts or tickets on your Zendesk account directly from your survey responses.
Zendesk Survey Integration: Use Cases
Create/Update Contacts on Zendesk from Survey Responses
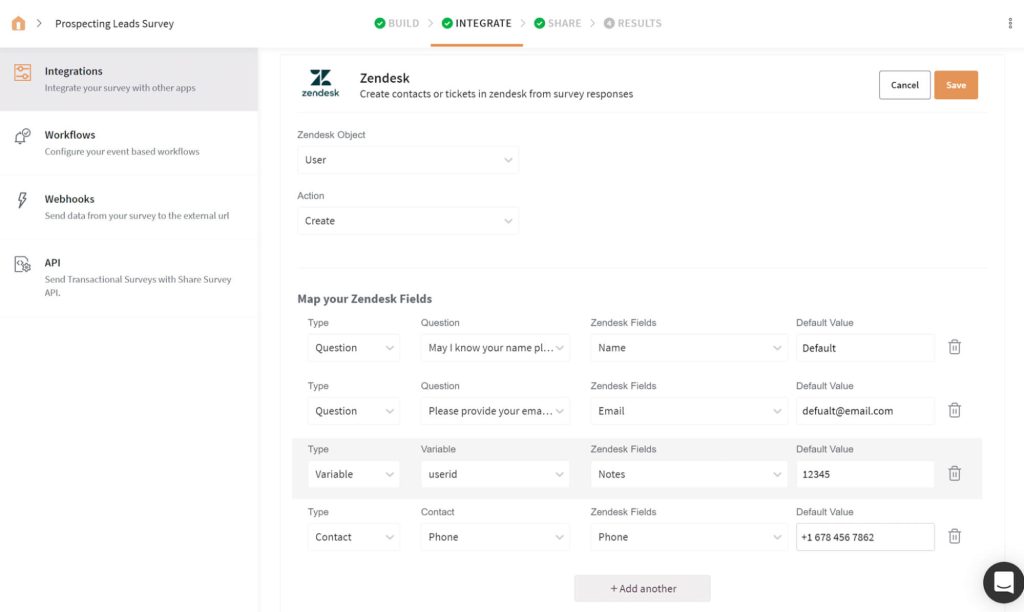
Choose the Zendesk Object and Action from the dropdown and map your survey responses to the corresponding Zendesk fields. Now when your survey is shared and starts getting responses, a new contact is created on Zendesk, in real-time.
Note: It’s mandatory to map at least one of your survey responses to the Name field of Zendesk.
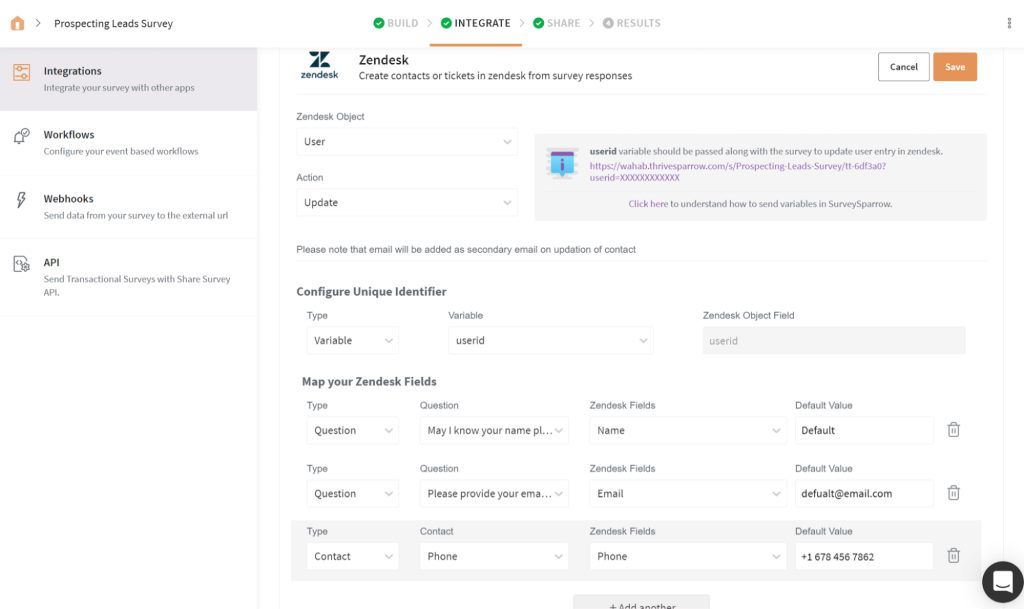
To update an existing user, you’ll have to first add a custom variable under the Global Variables section, on your survey builder. Once done, come back to the Zendesk mapping page and choose the object and action. Choose the unique identifier type as variable, select the variable from the dropdown, and map the survey responses.
Note: The variable user_id should be passed along with the survey to update ticket entry on Zendesk.
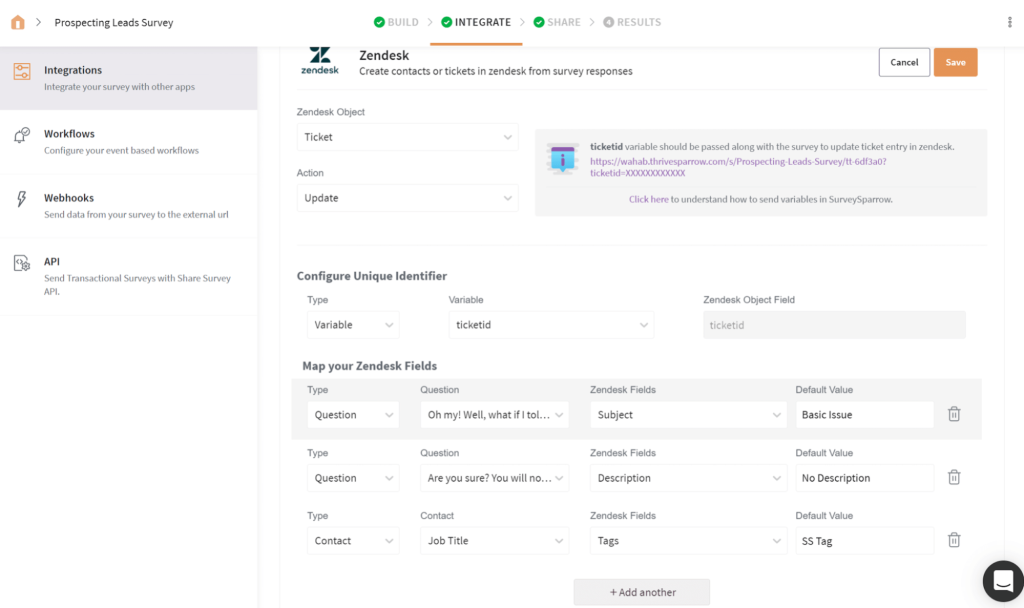
Create/Update Tickets on Zendesk from Survey Responses
To create a new ticket, choose the Zendesk Object and Action from the dropdown and map your survey responses with the respective Zendesk Fields. Now when your survey is shared and starts getting responses, a new ticket is created on Zendesk, in real-time.
Note: It’s mandatory to map at least one of your survey responses to Subject and Description fields of Zendesk.
To update an existing user, you’ll have to first add a custom variable under the Global Variables section, on your survey builder. Once done, come back to the Zendesk mapping page and choose the object and action. Choose the unique identifier type as variable, select the variable from the dropdown, and map your survey responses.
Note: The variable ticket_id should be passed along with the survey to update ticket entry of Zendesk.
How to set up your Zendesk Survey Integration
Webhooks
A webhook in web development is a method of augmenting or altering the behavior of a web page, or web application, with custom callbacks.- Step 1: Sign in to a Developer Account and select New app. Choose an App name, Workspace and select Internal Integration if your app is used internally.
- Step 2: Configure the access token and OAuth, and select a permission level.
- Step 3: Choose a canvas kit and configure app capabilities(In this case, Place on Messenger Home screen). Enter the Webhook URL and Save.
- Step 4: Save and test the App.

Trigger – New Survey Submission
- Step 1: Choose App and Event – Intercom and New Closed Conversation
- Step 2: Choose Account – Sign in to your Intercom account
- Step 3: Customize Deal
- Step 4: Find Data – Choose sample data to send
- Step 5: Test the connection
Action – Add/ Update Subscriber in Mailchimp
- Step 1: Choose App and Event – Askfield and select a survey to send
- Step 2: Choose Account – Sign in to your Askfield Account
- Step 3: Customize Share Survey
- Step 4: Select a survey from the list
- Step 5: Select a share option (In this case, Email Share)
- Step 6: Select a recipient email ID
- Step 7: Pass a custom variable(Example: contactid)(Optional)
- Step 8: Test the connection